FET Audio | Hi-End Audio & Electronics DIY Electronics & Repair

February 13, 2022

D1V2 + Zen I/V PCB – Aka D1 Clone

Filed under: DAC — Spencer @ 11:38 am

Completed to re-design my old D1V3.3 or D1 clone pcb as below:  Name it D1V2 + Zen I/V.  Please write to me if you are interested in the PCB.  No kit offer!  Full assembly Boards with limited supply only.

Totally I have made 3 versions of boards for testing – V17, V28 and V30.  The photos of each version is as below in sequence.

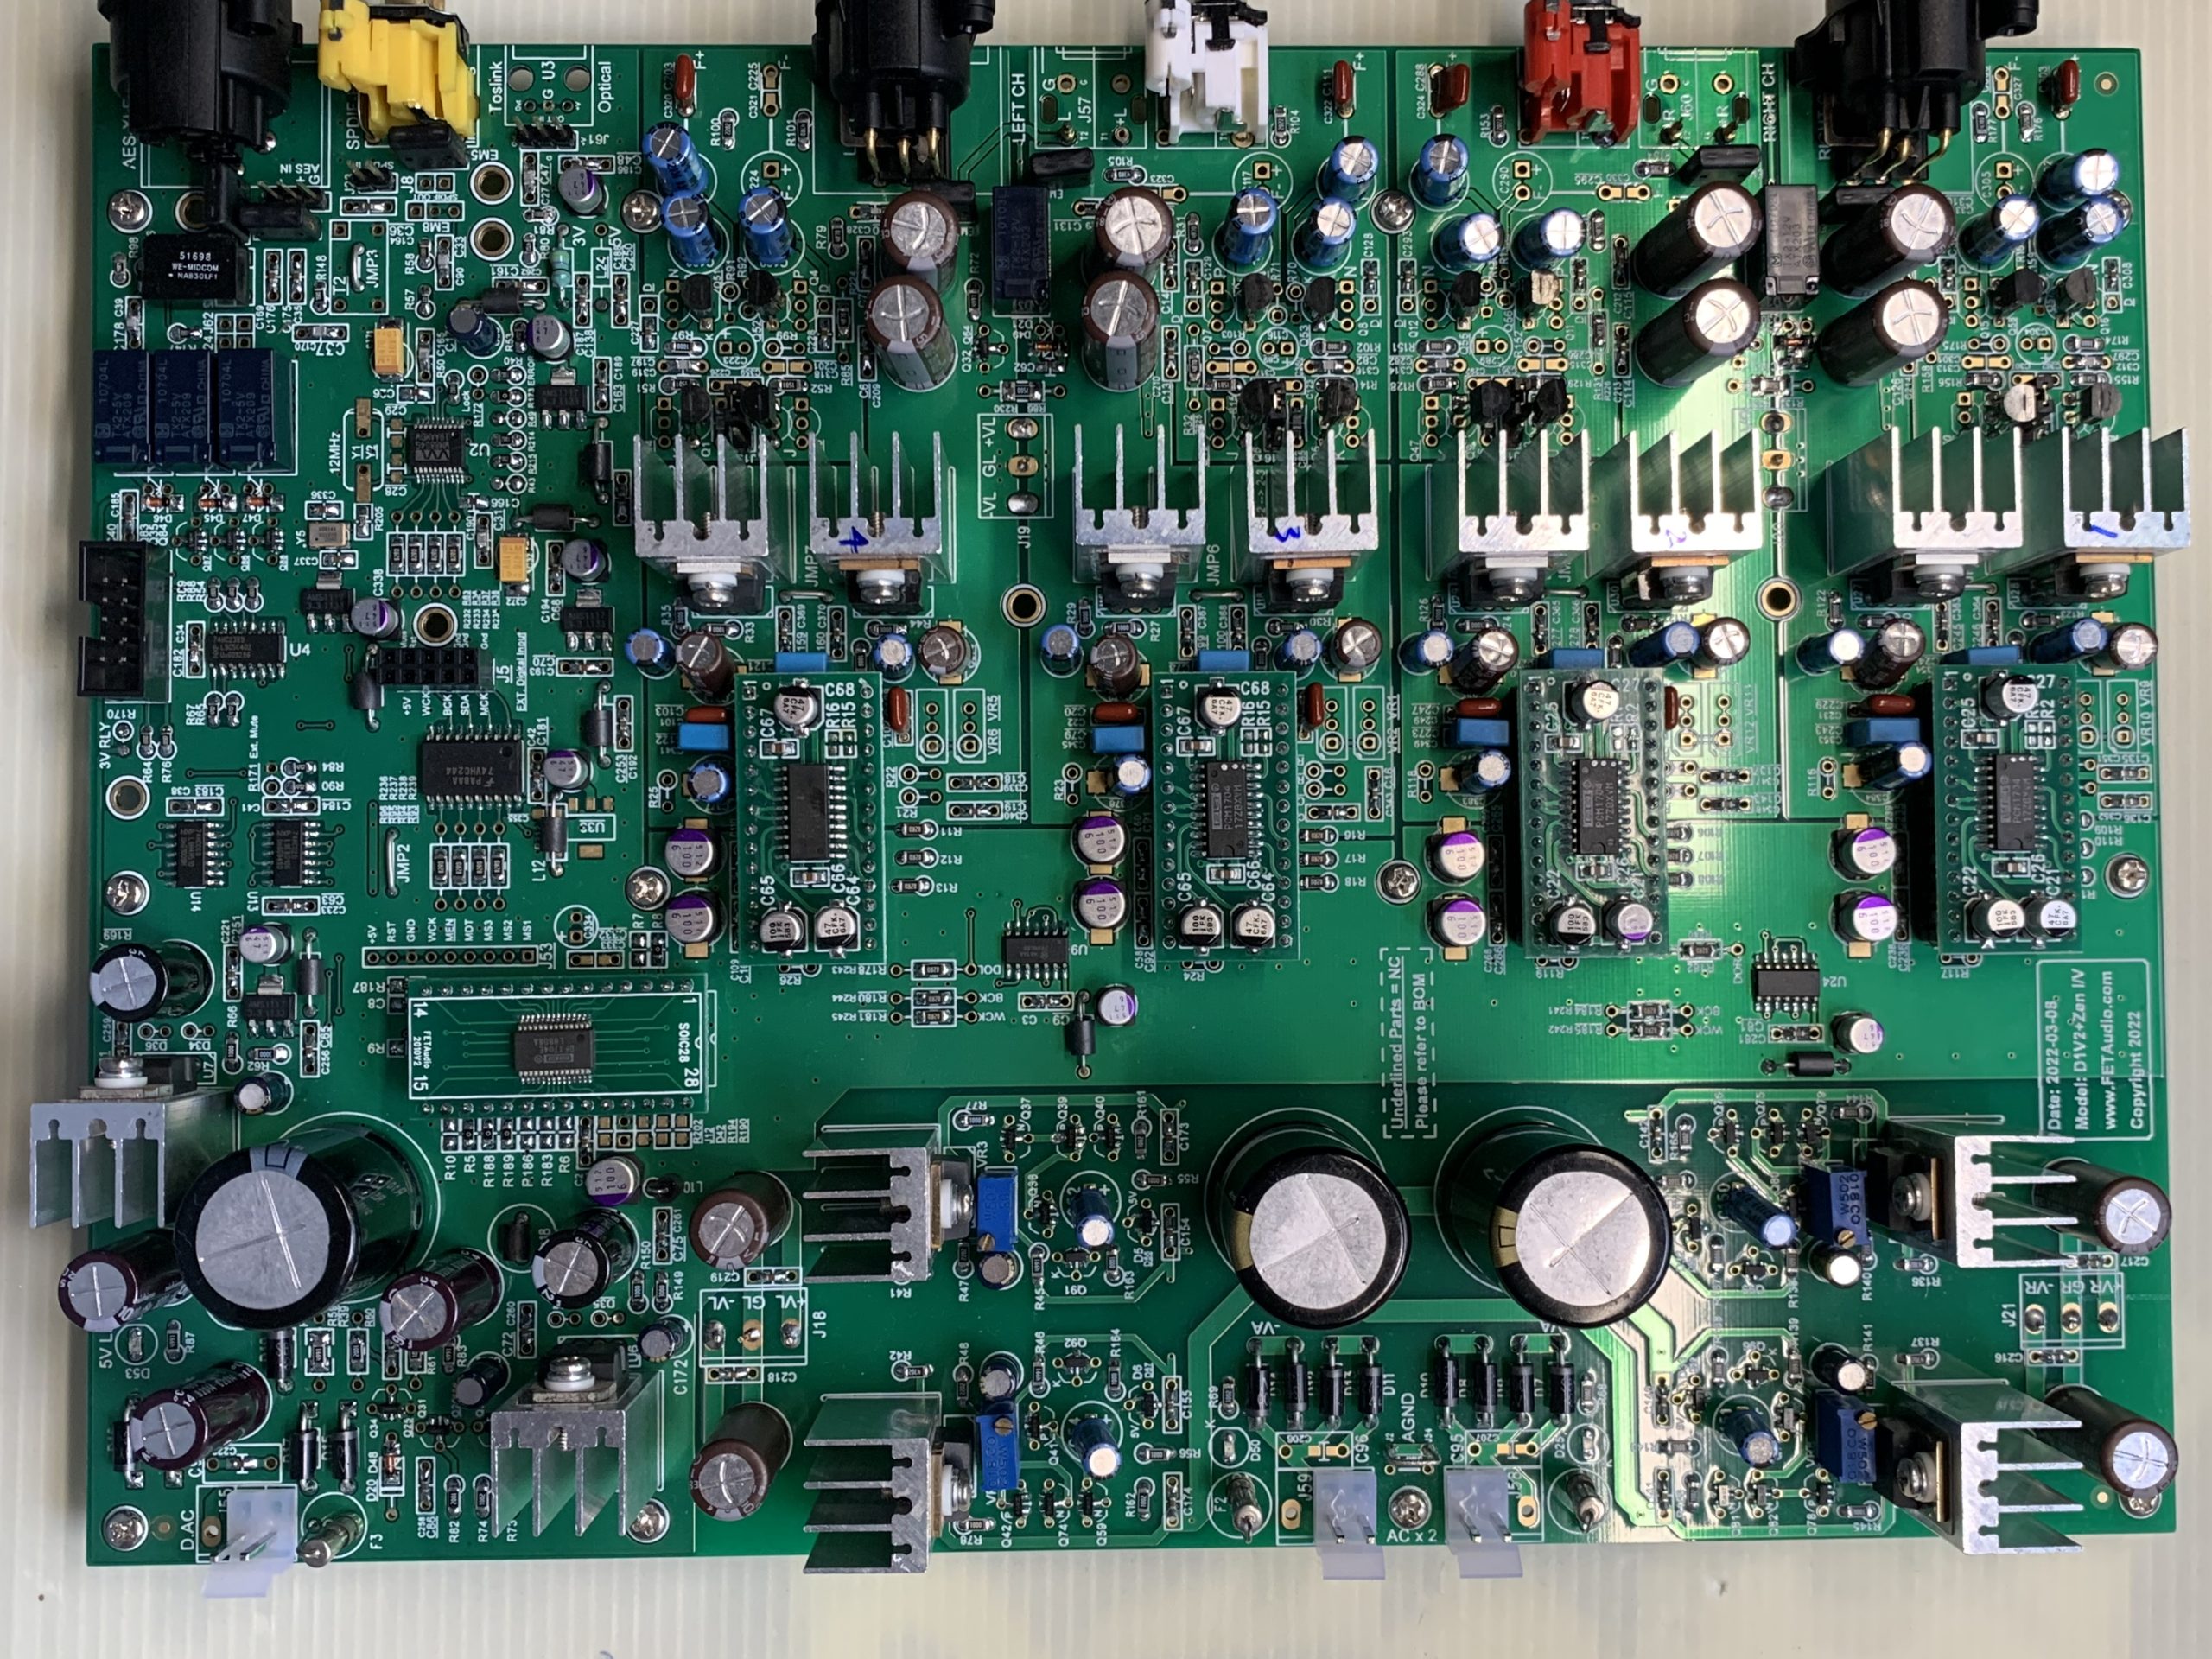
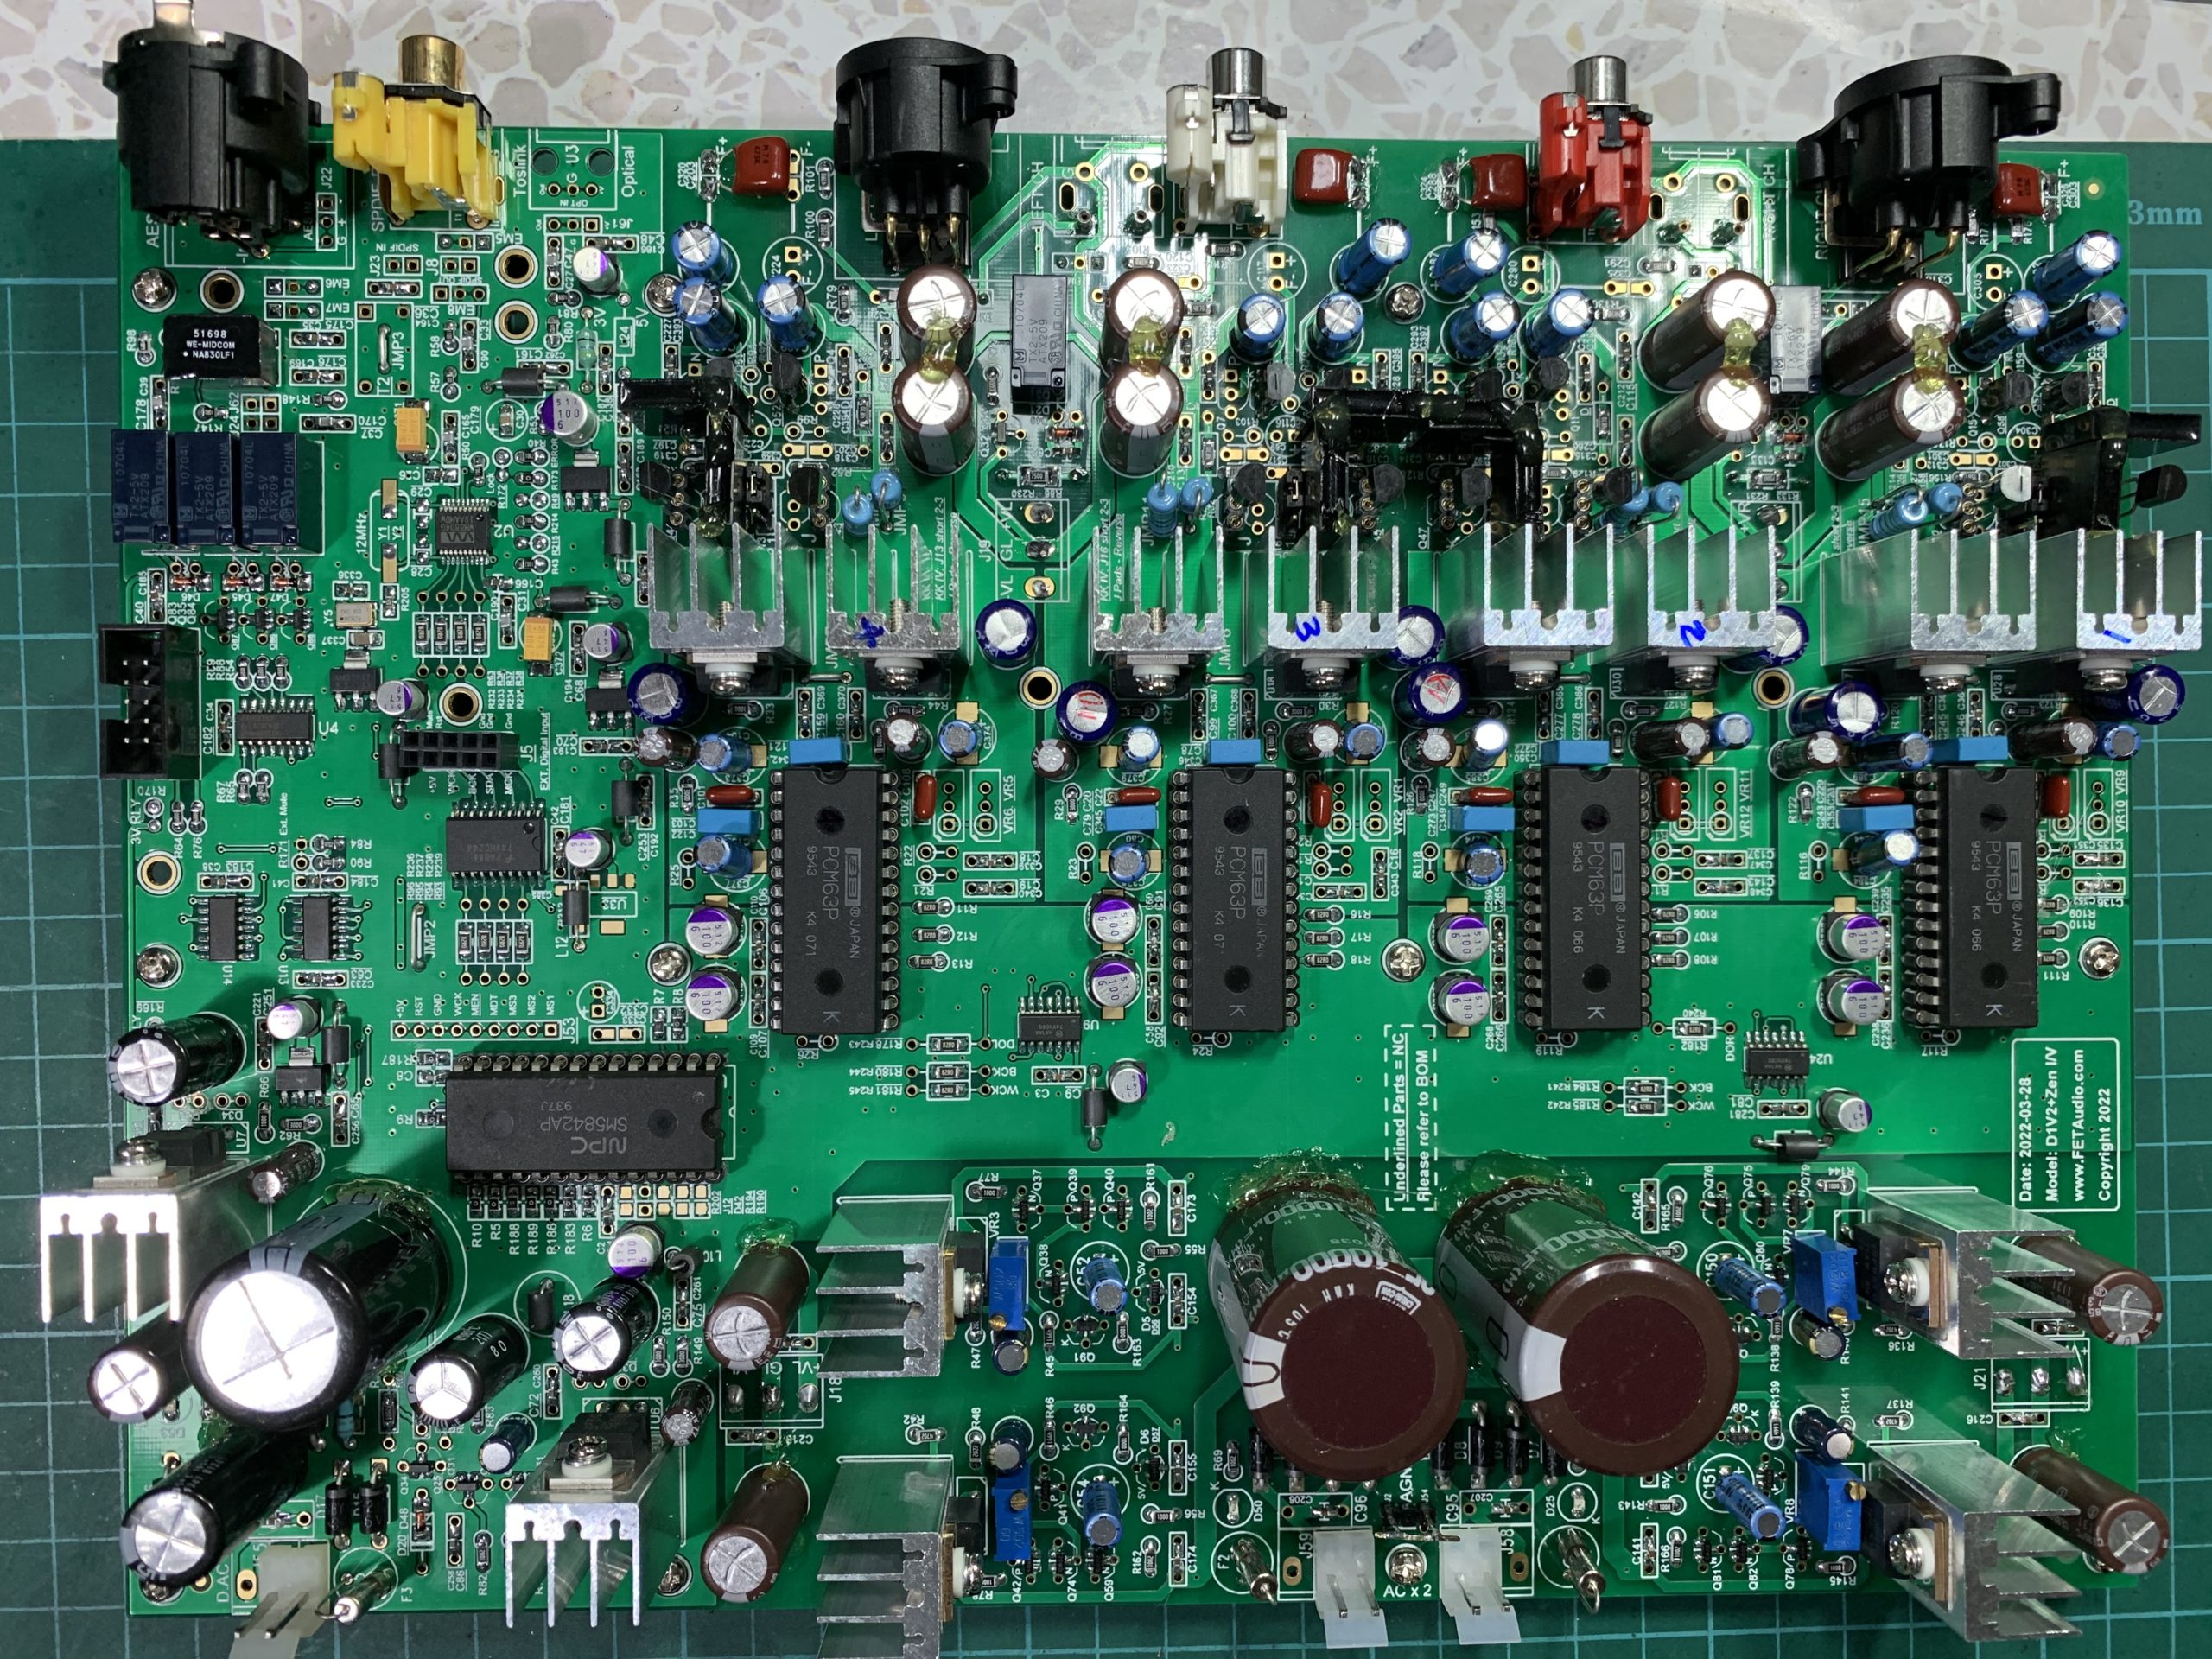
The board can use DAC – PCM63, PCM1702 and PCM1704.  Note PCM170x need to use a converter board as in second picture.  For digital filter, it can use SM5842, SM5843, SM5813, DF1700, PMD100, DF1704, DF1706 etc…  Digital receiver is WM8804 with excellent jitter performance.  More details in the reference manual below.

Compare to D1V33, it is much better in sound stage, imaging, resolution and details.  It still remain the analogy sound of smoothness and best vocal DAC when PCM63 is used.  When DF1704 and PCM1704 is used, the input is set to 16-24 bit digital input mode and output of DF is set to 24 bit mode.  The resolution is found better than PCM63 a bit but remain the smoothness of R-2R DAC sound.

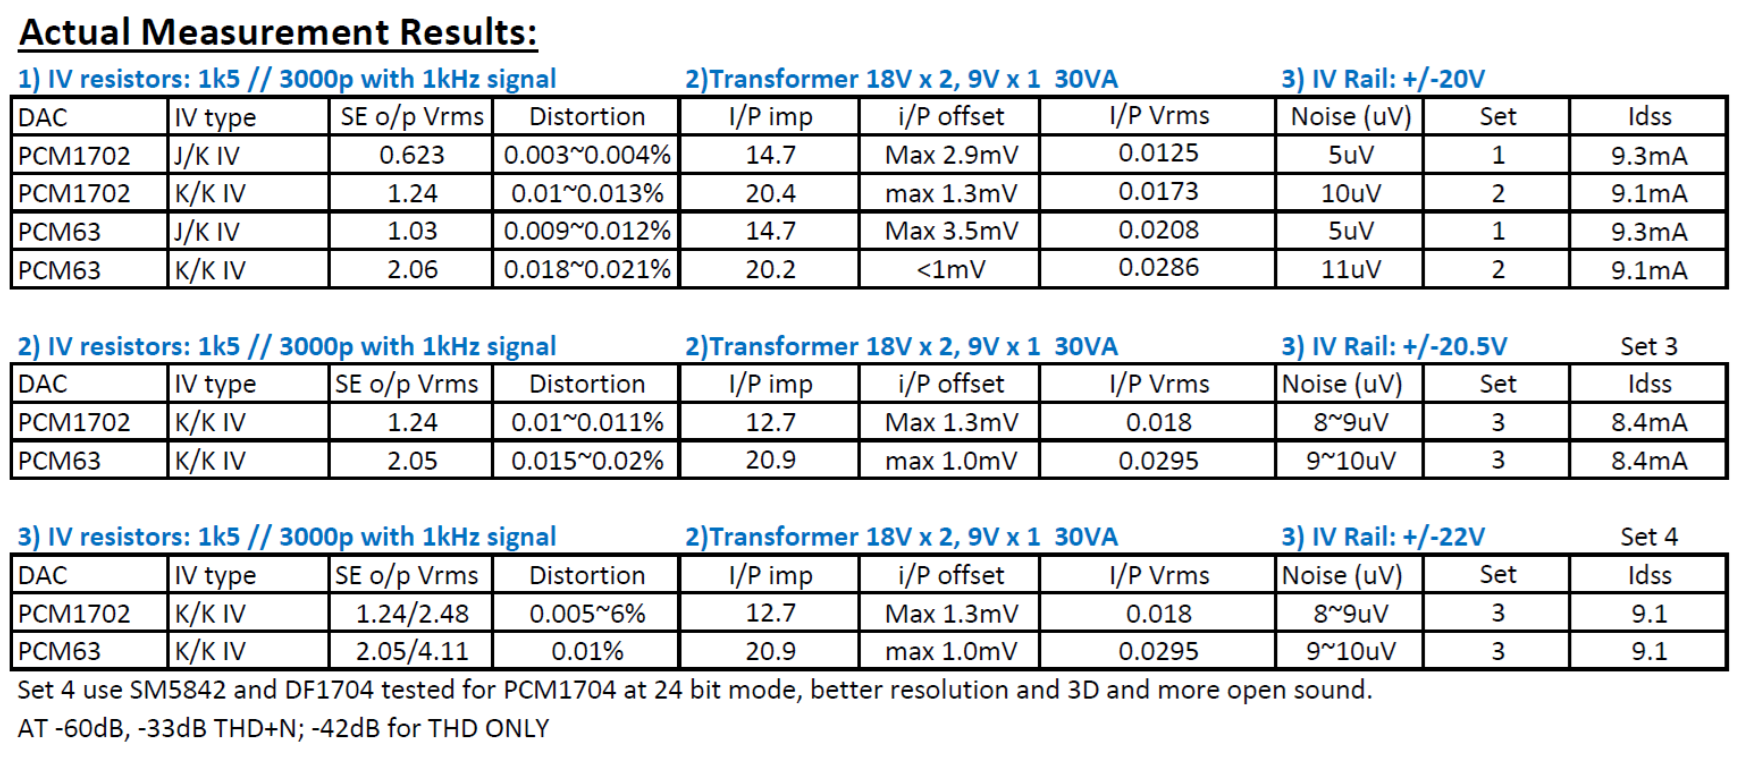
Two versions if Zen IV are tested – J/K and K/K.  Here is the summary of measured results : IV resistors & capacitors and Rail comparison table_v30

Conclusion is to use the KK IV + KK Buffer – 2SK369 or 2SK363 is the optimum design choice using 20V rails.  Nelson Pass original Zen IV using JK IV is having too weak output level at 30V rails.  Also J74 is not available easily with reasonable cost.

Reference Manuals:

D1V2_ZenIV Manual v30.1_ALL

D1V2_ZenIV Manual v28.3_all

D1V2_ZenIV_Manual_V17

Digital filter setting table (apply to all Version boards): DIGITAL FILTER PIN CROSS REFERENCE SM5842_V30.4

Related Images:

January 30, 2022

D1V33 + Zen I/V re-visit

Filed under: DAC — Spencer @ 10:47 pm

The Zen I/V was posted by Mr. Nelson Pass back in 2010.  I have not enough time to try that due to my work location change and far away from my equipment.  I am back home since 2021 and now it is time to try out the Zen I/V.  Below is the photos of the Zen IV that I put on the D1V33 board and so far the result is very positive. The distortion for SE measurement can be down to 0.002% to 0.004%, in fact that is the distortion spec of the DAC chip.  Here is the information sharing for anyone interested to comment.

  1. Rail voltage is only +/-20V as it is the limit of the current D1V33 board default supply. 
  2. Use Drain resistor of 1.5k ohm due to limit of the rail voltage and thus give a Vd about 7V for jfet Idss of about 8mA.  This is compromise due to Rail voltage max at 20V.
  3. Use daughter boards to put on top of original jfet IV locations.  Since the pins for supply, input and output are not the same, thus I have to design 4 similar boards with different locations of the pins.  The boards are names #1 ~ #4 for identification.  Daughter Board is connected to main board via pins, some holes are not really on top and thus the pin has to be soldered a bit tilted (best locations of pins).
  4. Emitter follower is added to the Zen I/V with a pair of transistors to buffer the output to have lower output impedance.  The distortion so far do not see any degrade in readings.  In fact jfets pairs can be used but it will increase the cost!
  5. SMD resistors 1206 or MELF 1/4 W and capacitors 0805 are used on top and bottom of boards to make the board as small as possible.
  6. Tough job is to remove the original Jfet IV parts on the main board and it is helped by a de-solder station make by YiHua 948 (about US$60).  SMD part is soldered with hot air gun also YiHua 8786D 2-in-1 station (about US%65).  Really handy tools and cheap!
  7. I still left some pcbs and thus those interested, I can send to them with cost of SGD$20 for each set (include paypal and shipping cost).  Sorry I do not have any more K170/J74 match pairs for sell!

My version of Zen I/V circuit: D1_V2_2_ZenIV_ckt

3D view of the Zen I/V board: D1_V2_2_ZenIV_3D

Related Images:

December 9, 2021

hp 339A distortion meter

Filed under: Test Equipment — Spencer @ 2:09 pm

I acquired this machine for more than 10 years and was defective due to transformer spoilt (super hot) and burnt fuse about 3 years ago.  I did not have time to repair it since then.  Recently I saw a transformer on sales on ebay and thus I purchased it and make replacement.  Reason for the failure is the capacitors C320 and C321 short circuit in the power supply section.  I put back two film capacitor 0.68u 63V type.  Here are the photos of the repair for reference.

Related Images:

November 18, 2021

Tektronix 577 curve tracer repair – Collector Supply Disable Light ON at 6.5V and 25V positions

Filed under: Test Equipment — Spencer @ 7:52 pm

The Tek 577 curve tracer is more than 25 years and components start to fail from time to time.  The symptom is front YELLOW light ON (Collector Supply Disable Light)  after power on and cannot output any voltage.  After tracing, the circuit, the reasons is due to K115 not turn on, due to K125 not turn on, due to Q588 open.  Replace new 2N222A to Q588 but always burnt (try 3 pcs) after power up!  Later check base voltage is at 6.xV dc which is too high relative to Emitter at -12V.  Thus transistor will be burnt after power up.  Check Q586 is fine and then after removing Q586, the base at Q588 is still very high voltage.  Thus suspect C587 defective (leaking).  So change C587 by using 0.68 + 0.47 = 1.15uF (original is 1uF) from Tant to film capacitor.  Also change C586 as it may also be defect soon.  After plug in Q586 and Q588, the set works again!  Here are the pictures of repair.

Lesson Learnt: Tantalum capacitors when failed, it always leaking or even short circuit!

Related Images:

October 22, 2021

Yamaha DA8X convert from Y2 to AES digital input

Filed under: DAC,Pro Audio — Spencer @ 10:15 pm

Total I brought two of these DA8X but I never have chance to hear the music from it.  Here is what I do to make it works:

Details modification procedure (New V4): Yamaha DA8X Modification from Y2 input to AES input v4

Data sheet: YM3436

Draft: DA8X draft notes

DA8X service manual: https://www.synthxl.com/yamaha-da-8x/

Bourns Pot: Bourns 10kA 1874875

Related Images:

Older Posts »

Powered by WordPress